Introduction
Electric vehicle (EV) ownership is soaring in the Gulf Coast, and Pensacola residents are looking for ways to charge their cars efficiently without the expense of a full electrical panel upgrade. A Level‑2 charger can add anywhere from 3.3 kW to 7.2 kW of load, which often exceeds the spare capacity of a typical 200‑amp service. Fortunately, modern ev charger load management solar pensacola solutions let homeowners share existing capacity between a solar array and a charger, keeping the installation code‑compliant and budget‑friendly. In this article we’ll explore the technical and regulatory landscape, explain how load‑management devices work, and walk you through a step‑by‑step process to add a Level‑2 charger using solar power without needing a costly panel upgrade.
Solar Cost Calculator – Florida Panhandle Only
* Estimate based on $3.25 per watt for solar installation.
* For Tesla Powerwall 3 Batteries, $15,000 for the first battery, $12,000 for each additional battery.
* Other variations and types of Batteries are available.
Why Load Management Matters in Pensacola
Pensacola’s warm climate provides an excellent environment for rooftop solar, with average sun hours that can produce 5–6 kWh per kilowatt‑peak each day. When you pair that generation with an EV charger, the combined load can fluctuate dramatically throughout the day. Without proper load‑management, the simultaneous draw of a charger and household appliances could trip the main breaker or violate the National Electrical Code (NEC). Implementing ev charger load management solar pensacola strategies ensures that the charger only draws power when the grid or solar system can safely accommodate it, preserving the integrity of your existing service and keeping you on the right side of local building codes.
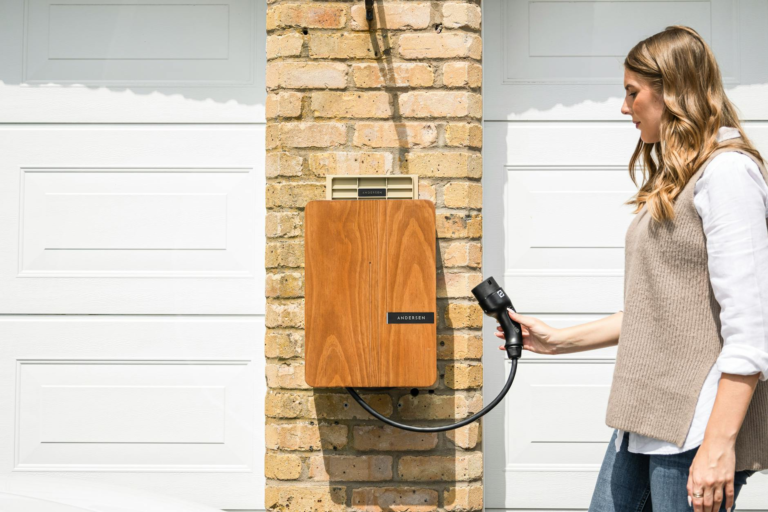
Understanding Level‑2 EV Chargers
A Level‑2 charger operates at 240 volts and typically delivers 30–40 amps, translating to a charging power of 7.2 kW or more. This speed can replenish an average EV battery from 20 % to 80 % in 4–6 hours, making it ideal for overnight home charging. However, that level of power can quickly consume the spare capacity of a residential panel, especially in older homes built before the recent surge in EV adoption. Knowing the exact amperage and voltage requirements of your charger is the first step toward designing a load‑management system that works with your existing service.
Power Requirements
Most Level‑2 units are rated between 24 amps (5.8 kW) and 40 amps (9.6 kW). The charger’s nameplate will list the maximum continuous current, which must be considered alongside your home’s peak demand. For example, a 30‑amp charger draws 7.2 kW, which at 240 V equals 30 amps. If your household already uses 120 amps of the 200‑amp service during evening hours, you’ll need a load‑management device to throttle the charger down to a safe level or to shift its operation to periods when solar production is high.
Solar Integration Basics
Solar photovoltaic (PV) systems convert sunlight into usable electricity, feeding power directly into your home’s electrical panel. In Pensacola, many homeowners benefit from net‑metering, which credits excess generation back to the utility. When a solar array produces more power than the house consumes, that surplus can be used to offset the draw of an EV charger, effectively reducing the net load on the grid. However, the timing of solar production and EV charging often mismatches—solar peaks at midday while most drivers plug in at night. Load‑management devices help bridge that gap by either delaying charging until solar is available or by dynamically adjusting the charger’s draw based on real‑time panel capacity.
Matching Solar Output to Charger Load
To maximize the benefit of ev charger load management solar pensacola, you’ll want to size your solar array so that it can cover a meaningful portion of the charger’s demand during daylight hours. A typical 6 kW residential system can generate around 30 kWh per day in Pensacola, which is enough to supply a 7.2 kW charger for roughly four hours of direct solar charging. By pairing that system with a smart load‑management controller, the charger can operate at full power when the sun is shining and automatically reduce its draw after sunset, ensuring that the total load never exceeds the panel’s capacity.
Load‑Management Devices Explained
Load‑management devices, sometimes called demand‑response controllers or smart EVSE (Electric Vehicle Supply Equipment) modules, sit between the charger and the main panel. They continuously monitor the total household load and adjust the charger’s power output in real time. Some devices can also communicate with your solar inverter to prioritize solar‑generated power for charging, while others rely solely on panel capacity thresholds. The result is a seamless, code‑compliant system that lets you add a Level‑2 charger without upgrading the main service.
Types of Devices
- Standalone demand‑response controllers that limit charger amperage based on a preset threshold.
- Smart EVSE units with built‑in Wi‑Fi, allowing remote scheduling and integration with home automation platforms.
- Hybrid solar‑aware controllers that receive real‑time data from the inverter to prioritize solar power for charging.
Code‑Compliant Load Management Rules (Pensacola)
Florida follows the 2020 edition of the National Electrical Code with a few state‑specific amendments. When installing a Level‑2 charger with load‑management, you must meet several key requirements to remain compliant. The NEC 2020 § 625.14 specifically addresses “demand‑controlled” EV charging, allowing reduced conductor sizes if a certified controller limits the maximum load. Additionally, § 210.19(A)(3) mandates that branch circuits be sized for the continuous load plus 125 % safety factor. By using a certified ev charger load management solar pensacola solution, you satisfy both the demand‑controlled clause and the continuous‑load sizing rule, avoiding the need for a panel upgrade.
NEC Requirements
The NEC requires that any load‑management controller be listed for the specific application and be installed in a location that is readily accessible for inspection. The controller must be capable of limiting the charger’s current to a value that, when added to the existing household load, does not exceed 80 % of the feeder’s rating. For a typical 200‑amp service, the combined load should stay under 160 amps during peak periods. Proper labeling of the load‑management circuit and inclusion of a dedicated disconnect are also mandatory.
Florida Building Code Highlights
Pensacola adopts the Florida Building Code (FBC) which references the NEC but adds local amendment regarding renewable energy integration. The FBC encourages the use of “smart” load‑management to facilitate solar‑powered EV charging, and it allows the exemption of a service upgrade when a certified controller demonstrates that the total demand remains within the existing feeder capacity. Inspectors will typically request a load‑calculation report that includes projected solar output, charger demand, and the controller’s limiting settings.
Step‑by‑Step Installation Guide
Below is a practical roadmap for installing a Level‑2 charger with ev charger load management solar pensacola while staying within code requirements. The process assumes you already have a functional solar array; if not, you’ll need to add that first.
Step 1 – Assess Existing Service
Start by reviewing your main panel’s nameplate rating and the available spare breaker slots. Use a clamp‑on ammeter to measure typical evening demand when most appliances are running. This data will help you determine how much additional load the panel can safely accommodate for the EV charger.
Step 2 – Size Your Solar Array
If you already have a solar system, obtain the inverter’s nameplate capacity and recent production logs. Aim for an array that can generate at least 4–5 kW during midday, which provides enough surplus to charge an EV at full power for a few hours. If your current array is undersized, consider adding panels before proceeding with the charger installation.
Step 3 – Choose a Load‑Management Controller
Select a controller that is certified for EV applications and supports solar‑aware operation. Popular choices include the JuiceBox Pro 40 with demand‑response mode, the ClipperCreek SmartLoad, and the Enel X JuiceNet. Ensure the device can limit the charger to a maximum amperage that keeps the total panel load under the 80 % threshold identified in Step 1.
Step 4 – Wiring and Connections
Install a dedicated 240‑V, 40‑amp circuit from the main panel to the load‑management controller, using #8 AWG copper conductors for a 40‑amp rating. Connect the controller’s output to the EVSE according to the manufacturer’s wiring diagram. If the controller includes a communication cable for the inverter, route that as well. All connections must be made in listed junction boxes and secured with proper torque.
Step 5 – Inspection and Approval
Schedule an inspection with the Pensacola Building Department. Provide the load‑calculation report, the controller’s UL listing, and the wiring diagram. The inspector will verify that the controller limits the charger’s draw to the pre‑approved value and that the installation meets all NEC and FBC provisions. Once approved, you can begin using your Level‑2 charger with confidence that it won’t overload your service.
Comparison of Popular Load‑Management Controllers
| Device | Max Load (A) | Solar‑Aware Communication | Approx. Cost (USD) |
|---|---|---|---|
| JuiceBox Pro 40 | 40 | Yes (via API) | $799 |
| ClipperCreek SmartLoad | 32 | No (stand‑alone) | $549 |
| Enel X JuiceNet | 40 | Yes (direct inverter link) | $899 |