When a roof is punctured for vents, chimneys, skylights, or solar panel mounts, the integrity of the building envelope hinges on how well those openings are sealed. In the Florida Panhandle, where heavy rainstorms and relentless humidity test every roofing system, a small mistake in roof penetration sealing can lead to water intrusion, mold growth, and costly structural repairs. This guide walks homeowners, contractors, and solar installers through the science and best practices of sealing roof penetrations so they remain watertight for years, even under the most demanding weather conditions.
Find us here:
Solar Cost Calculator – Florida Panhandle Only
* Estimate based on $3.25 per watt for solar installation.
* For Tesla Powerwall 3 Batteries, $15,000 for the first battery, $12,000 for each additional battery.
* Other variations and types of Batteries are available.
Understanding Roof Penetrations
Roof penetrations are any intentional openings that pass through the roofing material to accommodate equipment or utilities. Common examples include plumbing vent stacks, exhaust fans, roof hatches, chimney flues, and the mounting hardware for solar arrays. Each penetration creates a potential pathway for water, wind, and debris to enter the interior of a building. The size, shape, and location of the opening dictate the type of flashing and sealant required, as well as the installation technique needed to achieve a durable, long‑lasting seal.
Why Proper Sealing Matters in the Florida Panhandle
The Gulf Coast climate is characterized by intense summer thunderstorms, tropical storms, and a year‑round high humidity level that can accelerate the degradation of roofing materials. When roof penetration sealing is performed incorrectly, water can seep behind the flashing, saturate the roof deck, and eventually reach the interior spaces. This not only compromises the structural stability of the roof but also creates an environment for mold and mildew, which thrive in moist, warm conditions. Using the right techniques for roof penetration sealing solar installations, for example, ensures that the added hardware does not become a weak point in the building envelope.
Common Materials for Roof Penetration Sealing
Several products are engineered to bond with roofing membranes, metal flashing, and the various substrates found on a roof. The most widely used materials include polymer‑based sealants, polyurethane caulks, silicone adhesives, and self‑adhesive roofing membranes. Each material offers distinct benefits: polymer sealants provide excellent flexibility for thermal movement, polyurethane cures to a tough, waterproof film, silicone remains stable under UV exposure, and self‑adhesive membranes add an extra layer of protection against wind uplift. Selecting the appropriate material depends on the type of roof covering—whether it’s asphalt shingles, metal panels, or a single‑ply membrane—and the anticipated exposure conditions.
Sealants
- Polyurethane sealant – ideal for metal flashings and high‑traffic areas.
- Silicone sealant – best for UV‑exposed surfaces and flexible joints.
- Hybrid polymer sealant – combines the adhesion of polyurethane with the elasticity of silicone.
Flashing
Flashing is the metal or membrane component that wraps around the perimeter of a penetration, directing water away from the opening. Common flashing materials include galvanized steel, copper, aluminum, and pre‑formed rubberized membranes. Properly installed flashing should overlap the roofing material by at least two inches and be sealed with a compatible sealant to prevent water ingress at the seams. When dealing with solar panel mounts, the flashing must accommodate the mounting brackets while still providing a continuous barrier against moisture.
Step‑by‑Step Guide to Proper Roof Penetration Sealing
Following a systematic approach ensures consistency and reduces the chance of oversight. Below is a detailed checklist that contractors can use on every job, whether sealing a vent pipe or a roof penetration sealing solar array supports.
- 1. Inspect the Opening: Verify that the penetration is the correct size for the intended equipment and that the surrounding roofing material is in good condition.
- 2. Clean the Surface: Remove debris, old sealant, and any loose material. A clean surface is essential for roof penetration sealing solar fixtures to bond properly.
- 3. Install Base Flashing: Cut flashing to fit snugly around the penetration, ensuring a minimum 2‑inch overlap on all sides.
- 4. Apply Sealant: Use a polymer‑based sealant for metal flashings or a silicone sealant for areas exposed to direct sunlight. Apply a continuous bead before positioning the flashing.
- 5. Secure the Flashing: Press the flashing into place, smoothing out air pockets, and fasten with roofing nails or screws as required.
- 6. Reinforce the Joint: Apply a second layer of sealant over the edges of the flashing to create a watertight seal.
- 7. Test for Leaks: Conduct a water test by spraying water over the sealed area and checking for any signs of seepage.
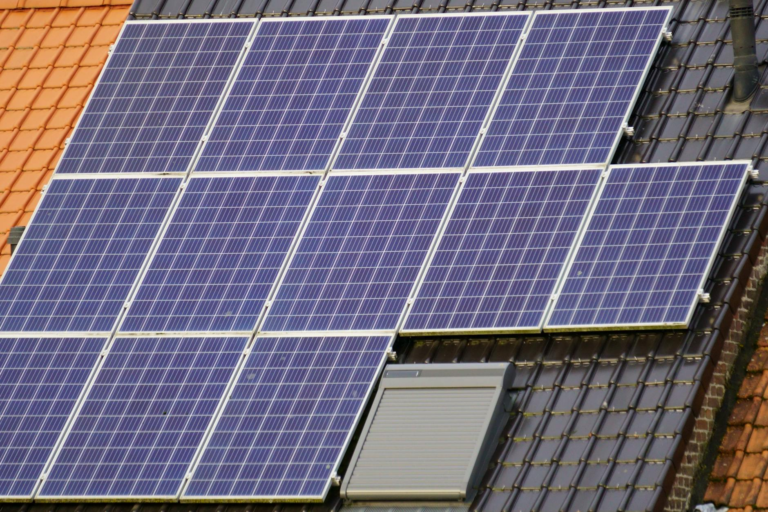
Special Considerations for Solar Installations
Solar panel systems add unique challenges to roof penetration sealing. The mounting hardware must support the weight of the panels while allowing for thermal expansion and contraction. Moreover, the penetrations for conduit and wiring must remain airtight to protect the electrical components from moisture. Using roof penetration sealing solar‑specific kits, which often include pre‑molded flashing and high‑performance sealants, simplifies the process and ensures compatibility with the photovoltaic equipment.
Mounting Brackets
Bracket installations typically involve a series of bolts that pass through the roof deck into the structural framing. After the bolts are in place, a rubberized gasket is positioned around each bolt head, followed by a bead of silicone sealant. This dual‑layer approach prevents water from traveling along the bolt shank and entering the interior of the building.
Cable Entry Points
Cables that run from the solar inverter to the interior electrical panel require dedicated conduit that penetrates the roof. The conduit must be sealed at both the roof and the interior wall. A common method is to use a split‑pipe flashing system that wraps around the conduit, with a silicone sealant applied to the seam. This creates a continuous barrier that resists both water and wind‑driven rain.
Inspection and Maintenance Routine
Even the best‑installed roof penetration sealing will benefit from regular inspection, especially in a climate as demanding as the Florida Panhandle. Seasonal checks should focus on the condition of the sealant, the integrity of the flashing, and any signs of water stains or rust on the penetrations. Promptly addressing minor cracks or gaps can prevent larger failures down the line.
| Inspection Item | Frequency | What to Look For |
|---|---|---|
| Sealant Condition | Quarterly | Cracks, brittleness, or missing sections |
| Flashing Attachment | Bi‑annual | Loose nails, rust, or uplift |
| Water Intrusion | After Storms | Stains, damp spots, or mold |
| Solar Mount Integrity | Annual | Bracket stability, gasket wear |
Frequently Asked Questions
Can I use regular roof sealant on solar panel penetrations?
While many generic sealants will adhere to roofing materials, solar installations often require sealants that can withstand higher temperatures and UV exposure. Choosing a product specifically rated for roof penetration sealing solar applications ensures long‑term durability.
How often should I reseal roof penetrations?
Most high‑quality sealants have a lifespan of 5–10 years, but environmental factors can shorten this. Conduct visual inspections at least twice a year and reapply sealant whenever you notice cracks, loss of adhesion, or after major storm events.
Is it necessary to remove old sealant before applying new?
Yes. Removing all remnants of the previous sealant prevents poor adhesion and gaps. Use a scraper or a solvent recommended by the sealant manufacturer to clean the surface thoroughly before applying fresh roof penetration sealing solar‑grade material.
Properly sealing roof penetrations is a critical step in safeguarding a home against the harsh weather patterns of the Florida Panhandle. By selecting the right materials, following a disciplined installation process, and maintaining a regular inspection schedule, homeowners and installers can ensure that vents, skylights, and especially solar panel mounts remain watertight for the long term.