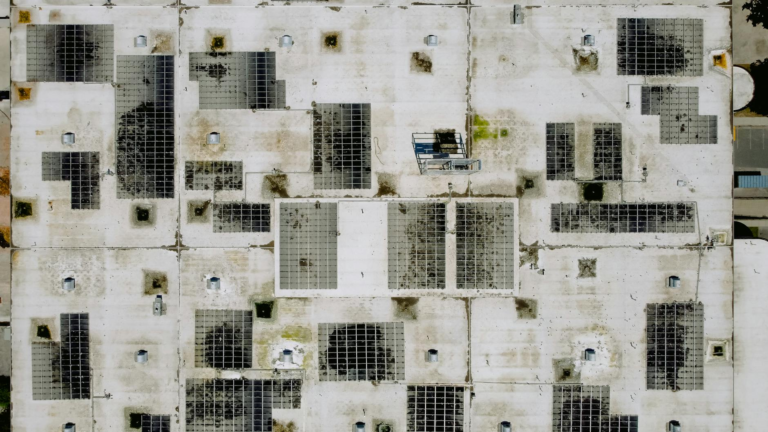
Why Layout Matters for Solar Installations
When a homeowner or commercial property manager looks at a newly installed solar array, the first thing they notice is often the visual impact. A clean, organized design can boost curb appeal and signal professional workmanship. Yet, beyond aesthetics, the arrangement of panels, inverters, wiring, and mounting hardware determines how easy it will be to keep the system running efficiently for years to come. In the Florida Panhandle, where heat, humidity, and occasional storms test every rooftop, a poorly thought‑out layout can quickly turn into a series of solar layout maintenance issues that drain time, money, and patience.
Find us here:
Solar Cost Calculator – Florida Panhandle Only
* Estimate based on $3.25 per watt for solar installation.
* For Tesla Powerwall 3 Batteries, $15,000 for the first battery, $12,000 for each additional battery.
* Other variations and types of Batteries are available.
Understanding the Foundations of a Good Solar Layout
A solid solar layout starts with a thorough site assessment. Professionals map out sun exposure, shading patterns, roof pitch, and structural capacity before any hardware touches the surface. They also plan the routing of conduit, the placement of disconnects, and the location of monitoring equipment. When these elements are coordinated from the outset, the system operates at peak performance and future service crews can navigate the rooftop with confidence. Conversely, shortcuts taken during design—such as cramming panels into tight spaces or ignoring the path of least resistance for wiring—set the stage for the dreaded solar layout maintenance issues that will surface months or years later.
Key Design Principles
- Align panels to minimize shading throughout the day.
- Leave clear access aisles for safe inspection and cleaning.
- Route conduit and cables away from high‑heat zones to reduce degradation.
- Position inverters and disconnects in ventilated, easily reachable spots.
Each of these principles directly influences the long‑term health of the installation. For example, an inverter tucked behind a stack of panels may overheat, leading to premature failure and costly replacement. Similarly, a maze of tangled wires behind a roof ridge can make a simple voltage check a day‑long ordeal. These hidden complications are the essence of solar layout maintenance issues that many property owners fail to anticipate.
How Poor Layout Transforms Into Maintenance Headaches
The moment a system goes live, routine maintenance tasks begin. Roof cleaning, inverter inspections, wiring checks, and performance monitoring become part of the regular service schedule. If the original layout ignored accessibility, each of these tasks can become a logistical nightmare. Imagine a service technician needing to climb onto a steep roof only to find that a critical disconnect is hidden behind a decorative solar rail. The extra time spent maneuvering not only inflates labor costs but also raises safety concerns.
In the humid climate of the Florida Panhandle, panels accumulate salt spray, bird droppings, and pollen more quickly than in drier regions. Regular cleaning is essential to maintain efficiency. When panels are installed too close together, water runoff can pool, creating standing water that encourages mold growth. Over time, these conditions accelerate the degradation of mounting hardware and the protective coating on panels, leading to more frequent repairs—a classic case of solar layout maintenance issues stemming from a flawed design.
Common Layout Mistakes That Trigger Future Problems
- Placing panels directly over roof penetrations without proper flashing.
- Running conduit across the roof slope without securing it to a structural member.
- Neglecting to include a dedicated service pathway for future upgrades.
- Installing inverters in low‑ventilation attic spaces.
- Overlooking local code requirements for clearances around electrical equipment.
Each mistake listed above creates a specific set of solar layout maintenance issues. For instance, missing flashing can lead to water infiltration, which not only harms the roof but also corrodes electrical connections. Unsecured conduit can sway in high winds, loosening connections and causing intermittent power loss. When a property owner later decides to expand the system, the lack of a pre‑planned service pathway forces contractors to redo large portions of the installation, dramatically increasing costs.
Long‑Term Cost Implications of a Bad Layout
While the upfront price of a solar system is often the primary concern for buyers, the hidden costs associated with poor layout can eclipse the initial investment over the system’s 25‑year lifespan. Service calls that take twice as long due to difficult access can add hundreds of dollars per visit. Unexpected component failures caused by overheating or water intrusion require expedited parts and specialized labor, further inflating expenses.
In addition to direct costs, there are indirect financial impacts. Downtime caused by a malfunctioning inverter reduces energy production, meaning the owner misses out on expected savings or revenue from net metering. If the system fails to meet performance guarantees, warranty claims become more complicated when the layout itself violates manufacturer installation standards. All of these factors converge to create a cycle of solar layout maintenance issues that erode the return on investment.
Proactive Strategies to Avoid Maintenance Nightmares
The best defense against future headaches is a forward‑thinking design process. Start by engaging a certified solar installer who follows the North American Board of Certified Energy Practitioners (NABCEP) guidelines and is familiar with local building codes. Request a detailed layout plan that includes clear labeling of all electrical components, conduit pathways, and service access points. Insist on a “maintenance‑ready” approach that prioritizes safety, ventilation, and ease of service.
During construction, verify that all mounting hardware is properly sealed and that flashing around roof penetrations is installed correctly. Use corrosion‑resistant materials suitable for the salty coastal air of the Panhandle. After the system is live, schedule a comprehensive walkthrough with the installer to document the exact locations of inverters, disconnects, and monitoring equipment. This documentation becomes invaluable when a third‑party service provider needs to perform routine checks or emergency repairs.
Maintenance Checklist for Property Owners
- Inspect panel mounting brackets for signs of rust or loosening every six months.
- Check inverter ventilation openings for dust and debris quarterly.
- Verify that all disconnects are clearly labeled and reachable without moving panels.
- Confirm that conduit runs are secure and free of cracks.
- Maintain a clean record of all service visits and component replacements.
Real‑World Example: A Florida Panhandle Roof
Consider a commercial building in Pensacola that installed a 250 kW solar array three years ago. The original contractor prioritized speed over layout precision, stacking panels tightly to maximize surface coverage. The inverters were placed on a low‑lying rooftop edge to hide them from view. Within the first year, the building experienced several solar layout maintenance issues: the inverters overheated, causing two shutdowns, and the tightly packed panels collected moisture that led to mold growth on the roof membrane.
When a new service provider was called in to address the problems, they discovered that the conduit runs were not secured to any structural members, resulting in sagging and intermittent power loss. To fix the situation, they had to dismantle a portion of the array, re‑route the wiring, install additional ventilation for the inverters, and add a dedicated service walkway. The remedial work cost more than 30 % of the original installation budget and took two weeks to complete, during which the building’s energy production dropped by 15 %.
Quick Reference Table: Impacts of Poor Layout vs. Good Layout
| Aspect | Poor Layout | Well‑Planned Layout |
|---|---|---|
| Access for Service | Obstructed, time‑consuming | Clear pathways, quick inspections |
| Component Longevity | Overheating, corrosion | Proper ventilation, protected connections |
| Long‑Term Costs | Higher labor, frequent repairs | Reduced downtime, lower maintenance spend |
Key Takeaways for Sustainable Solar Success
Investing in a solar system is a commitment to clean energy and financial savings, but that commitment only pays off when the installation is built on a solid design foundation. The hidden dangers of a bad layout—excessive heat, water intrusion, tangled wiring, and limited access—manifest as recurring solar layout maintenance issues that can erode the system’s performance and inflate costs over time. By prioritizing thorough site analysis, adhering to best‑practice design principles, and insisting on documentation that highlights service access, property owners can safeguard their investment against future headaches.
In the humid, storm‑prone environment of the Florida Panhandle, these precautions become even more critical. A well‑thought‑out layout not only protects the roof and equipment but also ensures that routine maintenance remains a straightforward, low‑cost activity rather than a disruptive, expensive ordeal.
Ultimately, the difference between a solar array that serves you reliably for decades and one that becomes a source of constant repair bills lies in the choices made at the design stage. Take the time to plan for maintenance today, and you’ll reap the benefits of clean, affordable energy tomorrow.
Conclusion: A thoughtful solar layout eliminates many of the maintenance challenges that can arise over a system’s lifespan. By addressing accessibility, ventilation, and code compliance from the start, you protect both your roof and your wallet from the long‑term headaches that poor design inevitably creates.