Understanding Solar Grounding System Safety
When a homeowner in the Florida Panhandle decides to install a solar photovoltaic (PV) system, the excitement of generating clean energy often overshadows the technical details that keep the installation safe. One of those critical details is the solar grounding system. Proper grounding is essential for safe solar installations across Florida Panhandle homes because it protects both the equipment and the occupants from electrical faults, lightning strikes, and unexpected voltage surges. In this article we’ll explore how a solar grounding system works, the components involved, the methods recommended for roof‑mounted and ground‑mount arrays, and the specific considerations that apply to the high‑humidity, storm‑prone environment of the Panhandle. By the end, you’ll have a clear roadmap for ensuring solar grounding system safety from design through ongoing maintenance.
Find us here:
Solar Cost Calculator – Florida Panhandle Only
* Estimate based on $3.25 per watt for solar installation.
* For Tesla Powerwall 3 Batteries, $15,000 for the first battery, $12,000 for each additional battery.
* Other variations and types of Batteries are available.
Why Grounding Matters in Solar Installations
Grounding creates a low‑impedance path for fault currents to flow safely into the earth, preventing dangerous voltages from lingering on metal frames, conduit, or inverter housings. In the event of a short circuit or a lightning strike, an effective ground directs the surge away from people and sensitive electronics. For Florida’s Panhandle, where thunderstorms are frequent and the ground can be highly conductive due to sandy soils, the need for a reliable grounding system is amplified. Moreover, the National Electrical Code (NEC) and local building codes require specific grounding practices to meet safety standards, and compliance is often a prerequisite for utility interconnection agreements. Ignoring these requirements can lead to equipment damage, fire hazards, or costly code violations.

Core Components of a Solar Grounding System
A typical solar grounding system consists of several key elements that work together to achieve solar grounding system safety. These include grounding electrodes (such as rods or plates), grounding conductors, bonding jumpers, and mechanical connectors that attach the conductors to metal frames and equipment enclosures. Each component must be sized correctly, installed according to NEC Article 690, and protected from corrosion. The grounding electrode provides the physical link to the earth, while the conductors carry fault currents to that electrode. Bonding jumpers ensure that all metal parts of the PV array are electrically continuous, eliminating potential differences that could cause arcing. Finally, the connectors—often listed as listed or UL‑approved—must be tightened to the manufacturer’s torque specifications to maintain a secure, low‑resistance connection.
Grounding Electrodes and Rods
The grounding electrode is the heart of any solar grounding system. In the Florida Panhandle, the most common electrode is a copper‑clad steel ground rod, typically 8 feet long and 5/8 inch in diameter. Because the local soil can be sandy and occasionally low in moisture, it’s advisable to install two rods spaced at least six feet apart and bonded together with a listed grounding clamp. Some installers prefer a ground plate buried at a depth of 12 inches, especially when the terrain is rocky or when rod installation is impractical. The electrode must be driven to a depth where it achieves a resistance of 25 ohms or less, as measured by a ground resistance tester. Proper placement and verification are essential steps to guarantee solar grounding system safety.
Bonding Conductors and Connectors
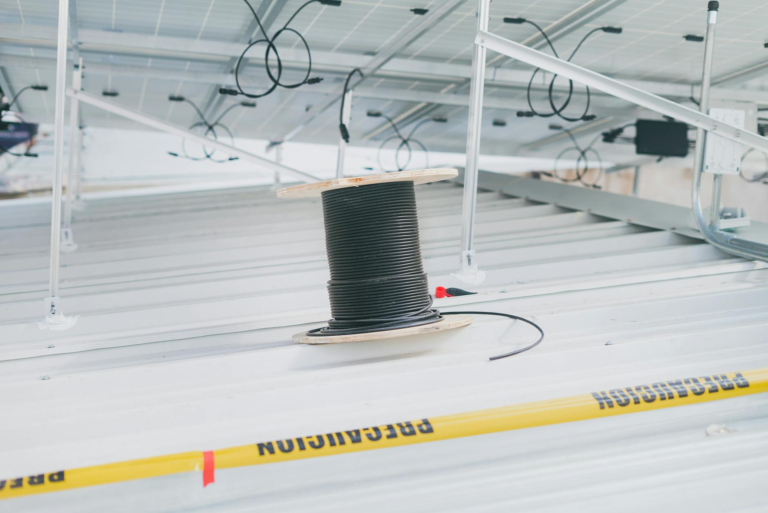
Bonding conductors link the PV module frames, racking, inverter enclosure, and any other metallic components to the grounding electrode. The NEC requires that these conductors be at least 4 AWG copper or 2 AWG aluminum for most residential systems, though larger sizes may be needed for larger arrays. Conductors should be installed in a continuous run whenever possible, avoiding unnecessary splices. When splices are unavoidable, they must be made with listed splice kits or irreversible compression connectors rated for outdoor use. Connectors, such as listed grounding lugs or clamps, must be corrosion‑resistant and compatible with the conductor material. In humid coastal areas of the Panhandle, using stainless‑steel or zinc‑plated hardware can extend the lifespan of the grounding system.
Grounding Methods for Roof‑Mounted Arrays
Roof‑mounted solar arrays present unique grounding challenges because the metal racking is often attached to the roof deck, which itself may be a non‑conductive material like asphalt shingles. The most common method for achieving solar grounding system safety on roofs is to bond the racking to a dedicated ground rod driven near the building foundation. A grounding conductor runs from the rod up the side of the house, through a conduit, and attaches to the racking using listed clamps. In some cases, especially with metal roofs, the roof itself can serve as a grounding path if it is properly bonded to the electrode. However, this approach requires careful evaluation of the roof’s continuity and the presence of any insulating layers that could impede the flow of fault current.
Another technique used in the Panhandle is the “ground‑through‑railing” method, where the racking’s vertical rails are electrically connected to the ground rod via a grounding strap. This strap is typically a 4 AWG copper braid that runs inside a protective conduit to shield it from UV exposure and moisture. The conduit must be sealed at entry points to prevent water ingress, which could otherwise cause corrosion and increase resistance over time. By integrating the grounding conductor into the structural elements of the racking, installers can reduce the number of external cables and improve the overall aesthetics of the system while maintaining solar grounding system safety.
Grounding for Ground‑Mount Systems
Ground‑mount solar arrays are often larger and may be installed on metal frames that are directly anchored to concrete pads. In these installations, the grounding strategy typically involves bonding the metal frame to a ground rod or a ground plate placed beneath the concrete. The grounding conductor is routed through a conduit that runs beneath the frame, providing protection from mechanical damage and UV exposure. Because the concrete can act as a semi‑conductive medium, many installers embed a grounding electrode directly into the concrete during the pad construction, ensuring a low‑impedance path to earth. For larger commercial‑scale ground‑mounts, a ground ring—comprising a continuous copper conductor encircling the array—may be used to distribute fault currents evenly across the site.
Florida Panhandle Specific Considerations
The Florida Panhandle’s climate introduces several factors that influence solar grounding system safety. First, the region experiences high humidity and occasional salt spray from the Gulf of Mexico, which can accelerate corrosion of metal components. Selecting stainless‑steel or hot‑dip galvanized hardware, along with UV‑stabilized conduit, helps mitigate these effects. Second, the area is prone to severe thunderstorms and occasional tornadoes, making lightning protection an essential complement to grounding. Installing a dedicated lightning arrester on the array’s highest point, connected to the same grounding electrode used for the PV system, provides an additional path for lightning currents and reduces the risk of flashovers.
Third, the sandy soils common to the Panhandle can sometimes result in higher ground resistance. To address this, installers may use a ground enhancement material (GEM) around the electrodes, which improves contact with the surrounding soil and lowers resistance. Finally, local building codes may require a separate grounding electrode for the solar system, distinct from the home’s main electrical ground, to ensure that fault currents from the PV array do not interfere with the household wiring. Consulting with the local building department and a licensed electrician familiar with NEC 2023 updates is crucial for compliance.
Common Mistakes and How to Avoid Them
- Using undersized grounding conductors that do not meet NEC Table 250.122 requirements.
- Installing a single ground rod in sandy soil without testing for resistance, leading to high impedance paths.
- Neglecting to bond all metal parts, such as inverter enclosures, junction boxes, and mounting rails, creating potential differences.
- Choosing connectors that are not listed for outdoor or photovoltaic use, which can corrode quickly in humid conditions.
- Failing to protect grounding conductors with conduit, allowing UV degradation or mechanical damage.
- Skipping the final ground resistance test, assuming the system is safe without verification.
Each of these mistakes can compromise solar grounding system safety, resulting in equipment failure, fire hazards, or costly rework. The best approach is to follow a checklist during installation, double‑check all connections, and conduct a post‑installation ground resistance test to confirm that the resistance is 25 ohms or lower. Documenting each step with photos and test results also provides valuable evidence for warranty claims and future inspections.
Inspection and Maintenance Checklist
- Verify that ground rods are driven to the required depth and spaced appropriately.
- Inspect all bonding conductors for continuity using a low‑resistance ohmmeter.
- Check that all connectors are tight, corrosion‑free, and rated for outdoor use.
- Confirm that grounding conductors are routed inside conduit where required and that conduit ends are sealed.
- Measure ground resistance; it should be 25 ohms or less.
- Review lightning protection devices and ensure they are bonded to the same grounding electrode.
- Schedule a visual inspection annually, especially after severe weather events.
Quick Reference Table for Solar Grounding Requirements
| Component | Minimum Size (AWG) | Typical Installation Detail |
|---|---|---|
| Grounding Electrode (Rod) | 5/8″ × 8 ft | Two rods, 6 ft apart, bonded with listed clamp |
| Grounding Conductor | 4 AWG Cu / 2 AWG Al | Continuous run, protected by conduit |
| Bonding Jumper | 4 AWG Cu | Connects frames, inverters, and metal enclosures |
| Connector Type | Listed UL‑rated | Stainless‑steel or zinc‑plated, torque‑tightened |
By following the guidelines outlined above, homeowners and installers in the Florida Panhandle can achieve a robust solar grounding system that meets code, withstands the local climate, and protects both people and equipment. Remember, the key to long‑term solar grounding system safety is proper design, meticulous installation, and regular maintenance.