When a homeowner or commercial property manager decides to go solar, the conversation often jumps straight to panel efficiency, inverter selection, and utility rebates. Yet, one of the most critical—and sometimes overlooked—components of a successful solar installation is the relationship between the mounting hardware and the building’s structural framework. In Tallahassee and Crestview, where weather patterns can swing from intense sun to heavy rain and occasional wind, aligning solar mounting systems with the roof’s internal skeleton is essential for safety, performance, and longevity.
Find us here:
Solar Cost Calculator – Florida Panhandle Only
* Estimate based on $3.25 per watt for solar installation.
* For Tesla Powerwall 3 Batteries, $15,000 for the first battery, $12,000 for each additional battery.
* Other variations and types of Batteries are available.
What Are Roof Rafters and Why Do They Matter?
Roof rafters are the horizontal members that span from the ridge beam at the top of the roof down to the wall plates at the eaves. Together, they form the primary load‑bearing structure that supports roofing materials, snow, wind uplift, and any additional weight placed on the roof surface. Because they are engineered to distribute loads evenly across the building’s walls, any equipment attached directly to the roof must respect the position and capacity of these rafters.
In the context of solar, the term “roof rafters solar mounting” captures the crucial intersection where mounting brackets, rails, and fasteners meet the structural framing. Ignoring this connection can lead to uneven stress, roof leaks, or, in extreme cases, structural failure. Properly locating mounting points on or near rafters ensures that the weight of the panels is transferred directly to the strongest parts of the roof, rather than relying on the sheathing or roofing material alone.
How Solar Mounting Systems Interact With Roof Framing
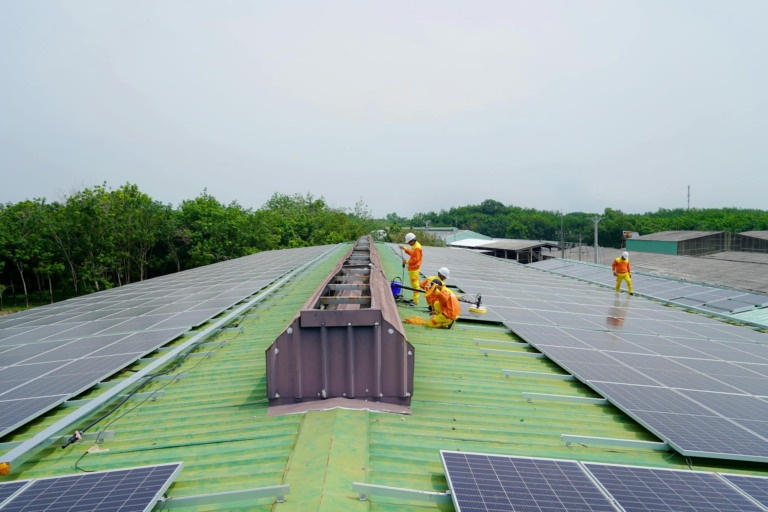
Modern solar mounting kits are designed with flexibility in mind. They typically consist of a series of rails that run parallel to the roof slope, with clamps that attach to the roofing deck. However, the most reliable attachment method involves securing these rails to the underlying rafters using lag bolts or self‑drilling screws. This approach creates a direct load path from the panels, through the rails, and into the rafters, which are built to handle such forces.

When installers overlook the rafters, they may resort to “roof‑only” mounting, which relies solely on the decking. While this can work for lightweight systems on sturdy decks, it often compromises the system’s ability to resist wind uplift—a significant concern in Florida’s hurricane‑prone zones. By aligning the solar mounting with the rafters, you provide a sturdier anchor that can meet local code requirements and insurance standards.
Assessing the Structural Capacity of Roof Rafters
Before any mounting hardware is installed, a qualified professional should evaluate the existing rafters. This assessment includes measuring rafter spacing (commonly 16 or 24 inches on center), checking for signs of rot or damage, and confirming that the rafters are sized appropriately for the roof’s span and load expectations. In many older homes in Tallahassee, rafters may have been undersized by today’s standards, making a thorough inspection indispensable.
Key factors that influence the suitability of rafters for solar mounting include:
- Rafter depth and width (e.g., 2×6, 2×8, 2×10)
- Species and grade of lumber (Southern Pine, Douglas Fir, etc.)
- Presence of additional loads such as HVAC units or skylights
- Condition of the wood—any cracking, insect damage, or moisture intrusion
If the existing rafters cannot safely support the additional load, reinforcement options such as sistering new lumber or installing supplemental steel brackets can be employed. These solutions maintain the integrity of the roof while still allowing for optimal roof rafters solar mounting placement.
Key Benefits of Aligning Solar Mounts With Roof Rafters
Proper alignment yields several tangible advantages, especially for installations in the Tallahassee and Crestview regions:
- Enhanced Structural Stability: Directly transferring panel weight to the rafters reduces stress on the decking and prevents sagging over time.
- Improved Wind Resistance: Securely bolted mounts are less likely to be uplifted during high‑wind events, protecting both the system and the home.
- Longer System Lifespan: Minimizing movement at the attachment points reduces wear on fasteners and brackets, extending the overall life of the solar array.
- Compliance With Local Building Codes: Many municipalities in Florida require documented attachment to structural framing for solar permits.
- Better Warranty Coverage: Manufacturers often stipulate that mounting must follow industry best practices, which include proper rafter engagement.
Common Mistakes in Roof Rafters Solar Mounting
Even seasoned installers can fall into traps that compromise the effectiveness of a solar system. Recognizing these pitfalls helps ensure a smoother project:
- Assuming all roofs have the same rafter spacing without verification.
- Using short screws that only penetrate the decking, not reaching the rafters.
- Skipping the clearance for roof ventilation, which can lead to moisture buildup.
- Overloading a single rafter with multiple panel rows, creating uneven load distribution.
- Neglecting to seal penetrations properly, resulting in leaks.
Each of these errors can be mitigated by a systematic approach that starts with a detailed structural survey and ends with precise, code‑compliant fastening.
Best Practices for Precise Roof Rafters Solar Mounting
Below is a step‑by‑step guide that aligns with industry standards and local regulations in Tallahassee and Crestview:
- Step 1 – Conduct a Structural Survey: Use a stud finder or a small inspection hole to locate rafters, record spacing, and assess condition.
- Step 2 – Design the Mount Layout: Position rails so that each attachment point lands on a rafter, maintaining a uniform spacing that matches the panel dimensions.
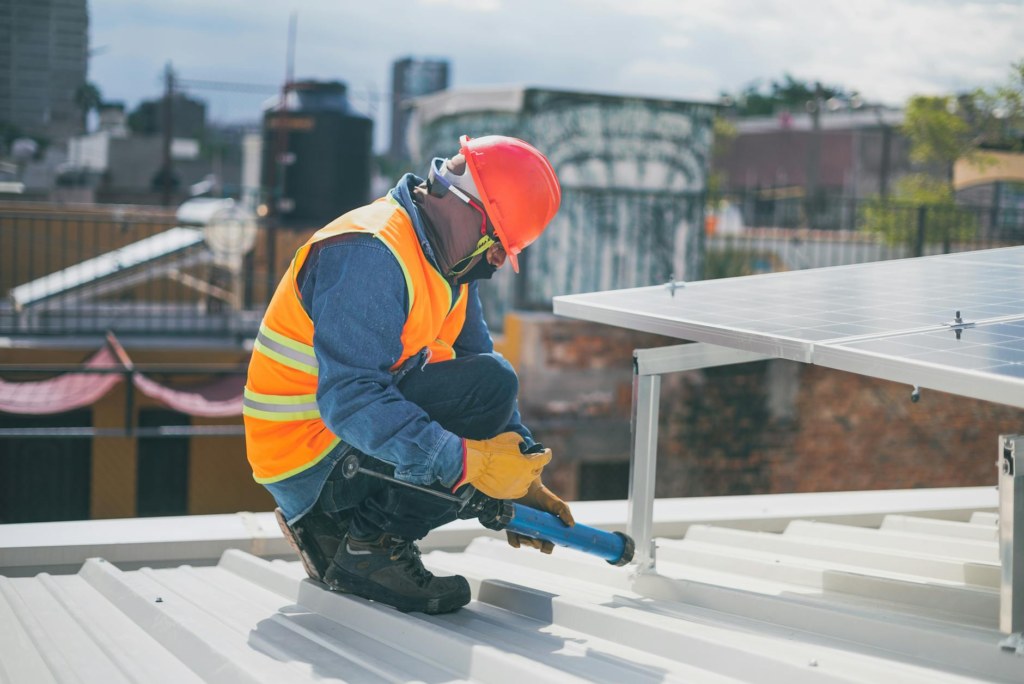
- Step 3 – Select the Right Fasteners: Choose lag bolts or self‑drilling screws of adequate length (typically 3–4 inches) to penetrate the decking and embed at least 1.5 inches into the rafter.
- Step 4 – Pre‑Drill Pilot Holes: This reduces wood splitting and ensures a clean entry for the bolts.
- Step 5 – Apply Sealant: Use a UV‑resistant silicone or roofing sealant around each penetration to prevent water intrusion.
- Step 6 – Verify Alignment: Use a level and a laser line to confirm that all rails are parallel and properly anchored to the rafters.
- Step 7 – Perform a Load Test: Apply a temporary weight equivalent to the panel load on each mount to verify that the rafters hold without deflection.
Following these steps not only ensures a robust connection but also simplifies the permitting process, as inspectors can clearly see that the roof rafters solar mounting method meets code requirements.
Local Climate Considerations for Tallahassee and Crestview
The Gulf Coast climate presents unique challenges. Summer brings intense solar radiation, while the rainy season introduces high humidity and occasional thunderstorms. Moreover, the region is susceptible to tropical storms that generate wind speeds exceeding 100 mph. These factors underscore the importance of a mounting strategy that fully integrates with the roof’s structural framing.
In practice, this means selecting corrosion‑resistant hardware—stainless steel or hot‑dip galvanized bolts are preferred—and ensuring that each attachment point is anchored directly into the rafters. By doing so, the system can better withstand uplift forces and reduce the risk of panel displacement during severe weather events.
Sample Load‑Distribution Table
| Rafter Size | Maximum Uniform Load (lb/ft) | Recommended Bolt Length (in) |
|---|---|---|
| 2×6 (Southern Pine) | 25 | 3.5 |
| 2×8 (Southern Pine) | 35 | 4.0 |
| 2×10 (Southern Pine) | 45 | 4.5 |
The figures above provide a quick reference for installers working in the Tallahassee and Crestview areas. While the numbers are based on typical residential loading scenarios, any specific project should be validated by a structural engineer, especially for larger commercial arrays.
Frequently Asked Questions
- Do I need a permit for solar installation in Tallahassee? Yes, most municipalities require a building permit that confirms the mounting system is attached to roof rafters and complies with local wind‑uplift criteria.
- Can I install solar panels on a roof with metal decking? Metal decking can be used, but the mounting brackets must still be secured to underlying rafters or engineered steel supports.
- How often should I inspect the mounting hardware? A visual inspection at least twice a year—once after the summer heat and again after the hurricane season—is recommended.
- What if my rafters are damaged or undersized? Reinforcement options include sistering new lumber, adding steel brackets, or using a ballast‑based mounting system that does not rely on penetrations.
Addressing these questions early in the planning stage helps avoid costly retrofits and ensures a smooth path from design to commissioning.
Conclusion
In the end, the success of any solar project in Tallahassee or Crestview hinges on more than just panel efficiency; it depends on how well the mounting hardware respects the building’s core structure. By prioritizing roof rafters solar mounting alignment, you protect your investment, meet local code requirements, and ensure that your system can weather the region’s demanding climate for decades to come.